
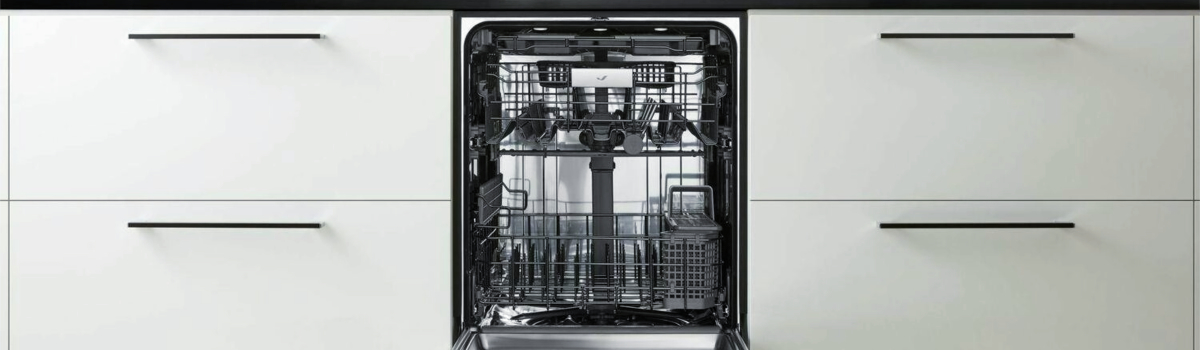
When your Jenn-Air dishwasher’s lights start flashing, it’s the machine’s way of saying “something’s off.” Sometimes it’s a quick reset and you’re back in business. Other times it’s pointing to a part that needs attention—like the heating element, door latch, or control panel. This guide breaks it all down in plain English, with simple checks you can do at home and clear next steps if a part has actually failed.
What the flashing lights usually mean
Blinking lights are a status alert. The control is detecting a condition it doesn’t like—water didn’t heat on time, the door switch didn’t confirm a solid latch, a pump didn’t run, or the user controls aren’t responding cleanly. The good news: most of these have quick at-home checks before you ever think about replacing parts.
Before you start: quick safety + sanity checks
- Power-cycle the dishwasher: turn off the breaker for 1 minute, then restore power.
- Open/close the door firmly to reseat the latch.
- Make sure the tub isn’t overfilled and the drain isn’t blocked.
- If your model supports a reset sequence, run it per your user manual.
Rapid “no-tools” checks that fix a lot of blinks
- Try a different cycle (Normal vs. Quick). If one cycle runs fine, it hints the hardware is OK and a prior cycle fault tripped the light.
- Inspect the filter area for gunk that can confuse water-level or drain timing.
- Listen at start-up: do you hear fill (hiss) → wash (swoosh) → heat/dry → drain (hum)? The stage that sounds “missing” usually points to the culprit.
Common causes and DIY fixes (from simplest to more involved)
Heating element (and heating element assembly)
If water isn’t getting hot fast enough, the control can flag it and blink the lights. Look for lukewarm dishes at the end or cycles that run long.
DIY steps:
Run a hot water tap at the sink until it’s hot before starting a cycle; this gives the dishwasher a head start. If flashes persist and dishes are not drying well, the element may be weak or failed. With power off, visually inspect the exposed coil for breaks or scorching. A continuity test with a multimeter confirms it: no continuity = replace the heating element (or the full element assembly, depending on your model).
Water inlet valve
Not enough water = poor heating and weak wash action, which can trigger blinking.
DIY steps:
Confirm the household supply valve under the sink is fully open and the inlet hose isn’t kinked. If fills are slow or inconsistent, the valve screen may be clogged. If a multimeter shows the solenoid has no continuity or the valve sticks mechanically, replace the inlet valve.
Door latch and its micro switch
If the door doesn’t “prove” it’s shut, the dishwasher stalls and may flash.
DIY steps:
Check for debris on the latch strike, verify the door closes flush, and look at the hinge alignment. If the latch feels loose or the cycle stops when you press on the door, the latch switch may be worn. A continuity test on the micro switch will tell you: no continuity when actuated = replace the switch or the full latch assembly.
Drain pump
Blinking that shows up near the end of the cycle can be a drain problem.
DIY steps:
Clean the filters, then inspect the drain hose for kinks or clogs (especially where it meets the garbage disposal or air gap). If the pump hums but doesn’t move water, the impeller could be jammed by glass or a seed. If the motor fails a continuity test—or gets power but won’t run—the drain pump is not repairable and should be replaced.
User control & display (touchpad/control panel)
Random blinking, unresponsive buttons, or “only some buttons work” often point to the user controls rather than the main board.
DIY steps:
Confirm the display lights up consistently. Try each button; note if certain keys are dead or ghost-press on their own. If faults started as intermittent button behavior and got worse, the touchpad or the full control panel is likely at fault. Many models sell the touchpad separately; others bundle it with the panel—replace according to your model’s design.
Main control board (a.k.a. control board)
This board powers nearly everything. It’s less common than the items above but still possible, especially after power surges.
DIY steps:
Rule out the simpler parts first. If a component never receives power during a cycle—and wiring and that component test good—the control board may be failing. Check your tech sheet for the exact diagnostic steps and fault codes for your model.
Read the fault codes (it really helps)
Jenn-Air models often store error codes you can retrieve via a button sequence. The code tells you which system flagged the problem—heat, fill, drain, door, or controls—so you can focus your efforts. Your tech sheet (usually behind the toe-kick) or user manual shows how to enter diagnostics and what each code means.
DIY flow: match the symptom to the fix
Lights blink soon after pressing Start?
Think door latch first. Re-seat the door, listen for a secure click, and check the strike. If cycling power makes it run for a bit then stop, test the latch switch.
Cycle runs but dishes are cool and wet?
Look at heating: pre-heat the sink water, confirm rinse-aid is filled, and check the heating element/assembly if drying never happens.
Long cycle, standing water, or blink near the end?
Focus on drain: clean filters, inspect hose/air gap, and test the drain pump for jams or a dead motor.
Random blinking + quirky buttons?
Suspect touchpad/control panel. If the display is fine but certain buttons are dead, that’s your part.
Very slow fill or “whooshing” never starts?
Check water inlet valve and the under-sink shutoff. If the valve coil has no continuity or the screen is packed with debris, replace the valve.
A few targeted tips that save time
- Start hot: run the sink hot 20–30 seconds before pressing Start.
- Use rinse aid: it boosts drying and reduces “heat didn’t reach target” alarms.
- Don’t overcrowd: blocked spray arms mess with heating and cycle timing.
- Keep filters clean: better flow = fewer false “drain” or “heat” faults.
Preventative care to avoid future blinking
- Monthly: rinse the filters and wipe the door gasket.
- Quarterly: clean spray arm holes and check the drain hose path.
- Bi-annually: inspect the inlet valve screen; look for slow fills.
- Always: use high-quality detergent, keep rinse aid topped up, and run hot water at the tap before starting.
When it’s likely a replacement part
If a continuity test fails on the heating element, drain pump, inlet valve solenoid, or door-latch switch, replacement is the correct fix. If the touchpad has dead keys—or the control board refuses to power a known-good component—the respective assembly should be replaced for reliability.
Quick FAQ
Can I just reset it and forget it?
A power reset can clear a one-off glitch, but repeat blinking usually points to a real issue like weak heating or poor draining.
Is there a secret “service mode”?
Most Jenn-Air models have diagnostics accessible by a button sequence in the manual or tech sheet. Pull the toe-kick panel—often the sheet is tucked behind it.
Do blinking lights always mean a bad control board?
No. Controls get blamed a lot, but heating, door latches, inlet valves, and drain problems are more common. Test before replacing boards.
Leave a Reply